3rd Party
Introduction
This manual provides instructions for managing Email Providers and Payment Gateways in the Sira platform's 3rd Party section. This section allows administrators to configure and manage email providers and payment gateways for seamless communication and transactions.
Accessing the 3rd Party Section
- Log in to your Sira admin account.
- Navigate to the 3rd Party section in the left sidebar.
Email Providers
Overview
The Email Providers tab allows you to create, edit, and manage email providers used for sending emails from the platform.
Features
- Add Email Provider: Add a new email provider.
- Search Email Providers: Search for existing email providers.
- Email Providers Table: View, edit, or delete email providers.

Email Providers Table Columns
| Column | Description |
|---|---|
| Sender Name | Name of the email sender |
| Username | Username for the email provider |
| Password | Password for the email provider |
| Status | Status of the email provider (Active/Inactive) |
| For Contact Us | Indicates if the provider is used for "Contact Us" |
| Sender Email | Email address of the sender |
| Actions | Edit/Delete options |
Create New Email Provider Form
Form Fields
| Field | Description | Required |
|---|---|---|
| Provider Name | Name of the email provider | Yes |
| Sender Email | Email address of the sender | Yes |
| Sender Name | Name of the sender | No |
| Host | Host address for the email provider | Yes |
| Port | Port number for the email provider | Yes |
| Username | Username for the email provider | Yes |
| Password | Password for the email provider | Yes |
| Enable SSL | Enable SSL for the email provider | No |
| Active | Status of the email provider (Active/Inactive) | No |
| For Contact Us | Use this provider for "Contact Us" emails | No |
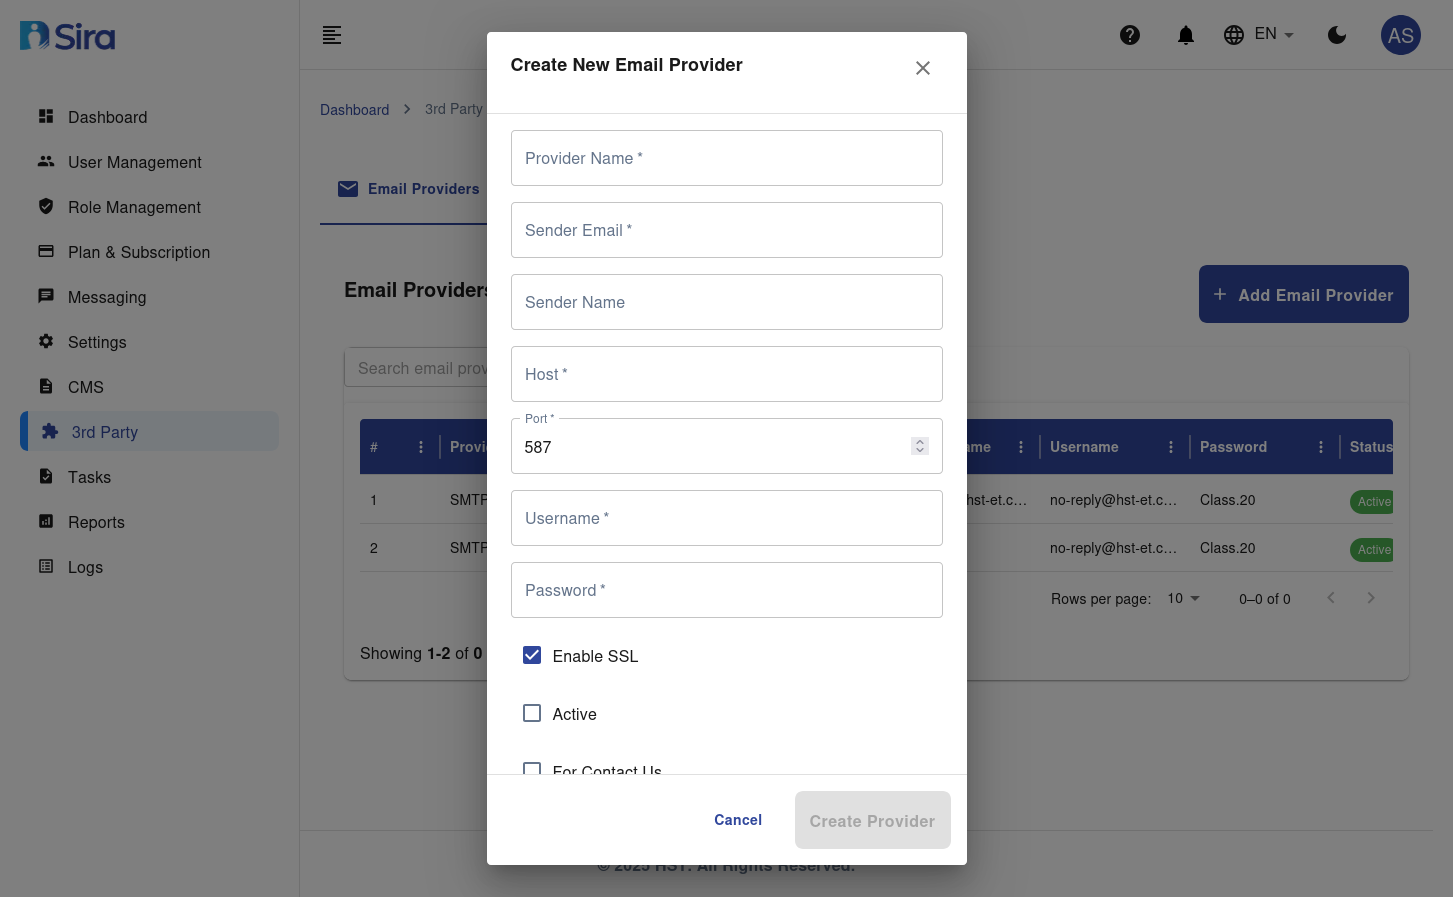
Instructions
-
Access the Form:
- Navigate to the 3rd Party section in the sidebar.
- Select Email Providers.
- Click the + Add Email Provider button.
-
Fill in the Form:
- Enter the Provider Name.
- Enter the Sender Email.
- Enter the Sender Name (optional).
- Enter the Host address.
- Enter the Port number.
- Enter the Username.
- Enter the Password.
- Toggle Enable SSL if needed.
- Toggle Active to set the status.
- Toggle For Contact Us if this provider is for "Contact Us" emails.
-
Save the Email Provider:
- Click the Create Provider button to add the new email provider to the system.
- Click the Cancel button to discard the form without saving.
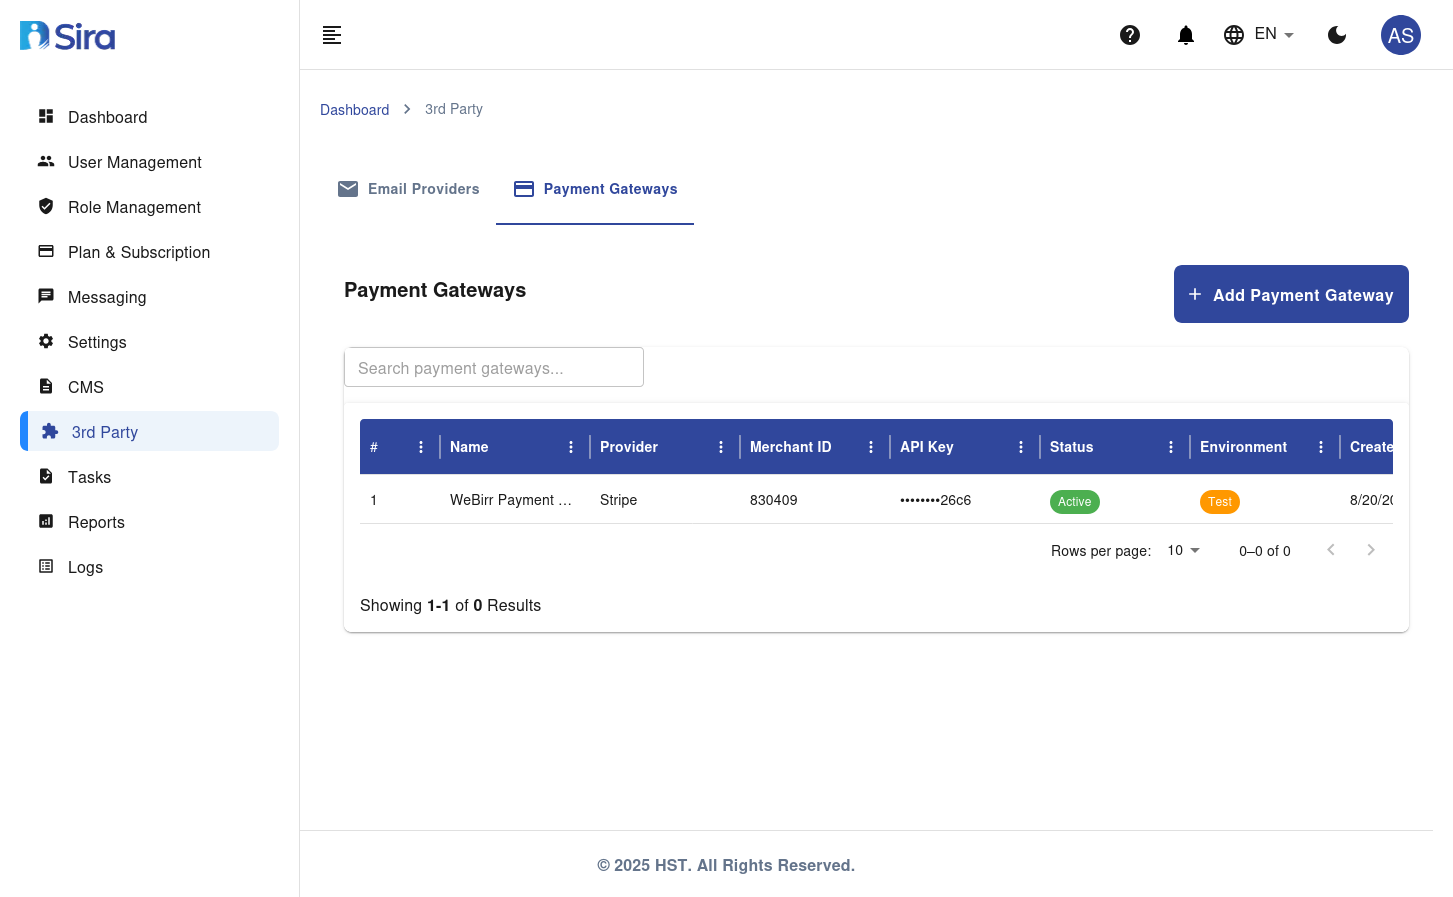
Payment Gateways
Overview
The Payment Gateways tab allows you to create, edit, and manage payment gateways used for processing payments on the platform.
Features
- Add Payment Gateway: Add a new payment gateway.
- Search Payment Gateways: Search for existing payment gateways.
- Payment Gateways Table: View, edit, or delete payment gateways.
Payment Gateways Table Columns
| Column | Description |
|---|---|
| Provider | Name of the payment gateway provider |
| Merchant ID | Merchant ID for the payment gateway |
| API Key | API Key for the payment gateway |
| Status | Status of the payment gateway (Active/Inactive) |
| Environment | Environment of the payment gateway (Test/Live) |
| Created At | Date when the payment gateway was created |
| Actions | Edit/Delete options |
Create New Payment Gateway Form
Form Fields
| Field | Description | Required |
|---|---|---|
| Provider | Name of the payment gateway provider | Yes |
| Gateway Name | Name of the payment gateway | Yes |
| Merchant ID | Merchant ID for the payment gateway | Yes |
| API Key | API Key for the payment gateway | Yes |
| Status | Status of the payment gateway (Active/Inactive) | Yes |
| Test Environment | Indicates if the gateway is in test environment | No |
| Metadata (JSON) | Optional JSON data for additional configuration | No |
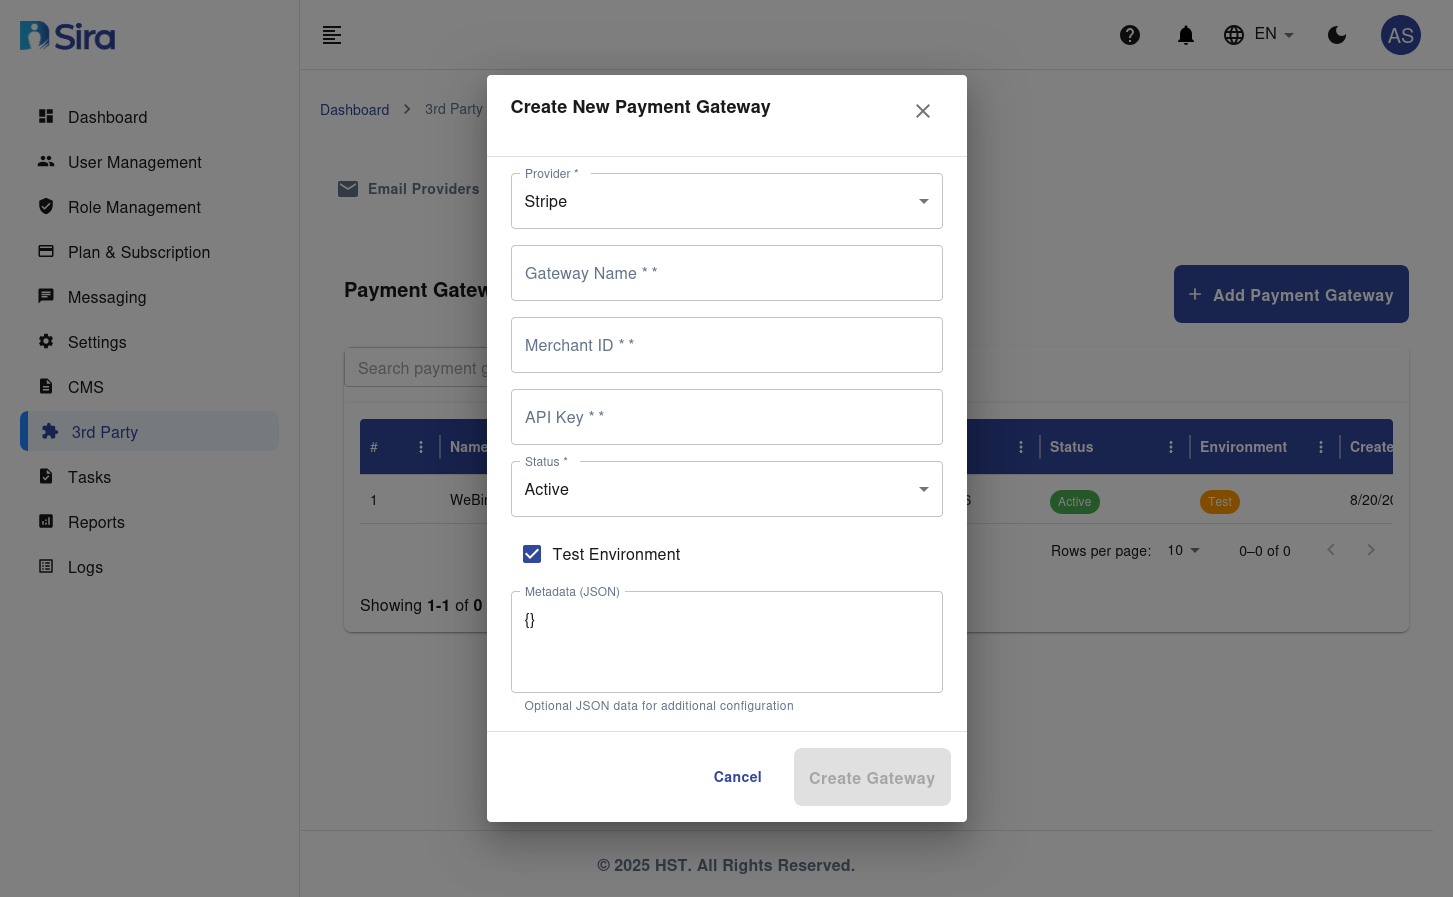 |
Instructions
-
Access the Form:
- Navigate to the 3rd Party section in the sidebar.
- Select Payment Gateways.
- Click the + Add Payment Gateway button.
-
Fill in the Form:
- Select the Provider from the dropdown.
- Enter the Gateway Name.
- Enter the Merchant ID.
- Enter the API Key.
- Select the Status (Active/Inactive).
- Toggle Test Environment if the gateway is in test mode.
- Enter optional Metadata in JSON format for additional configuration.
-
Save the Payment Gateway:
- Click the Create Gateway button to add the new payment gateway to the system.
- Click the Cancel button to discard the form without saving.
General Instructions
Creating a New Entry
- Navigate to the relevant tab (e.g., Email Providers or Payment Gateways).
- Click the "Add" button.
- Fill in the required details.
- Click "Create" to confirm.
Editing an Entry
- Locate the entry in the table.
- Click the "Actions" button.
- Select "Edit".
- Update the details.
- Click "Save" or "Update" to confirm.
Deleting an Entry
- Locate the entry in the table.
- Click the "Actions" button.
- Select "Delete".
- Confirm the deletion.
Troubleshooting
| Issue | Solution |
|---|---|
| Unable to save changes | Check your internet connection and ensure all required fields are filled. |
| Authentication failed | Verify the username, password, API key, and other credentials. |
| Connection issues | Ensure the host and port are correct and the service is accessible. |
Contact Support
For further assistance, contact the support team at [support email/phone].