Admin Portal Dashboard Sidebar Manual
Overview
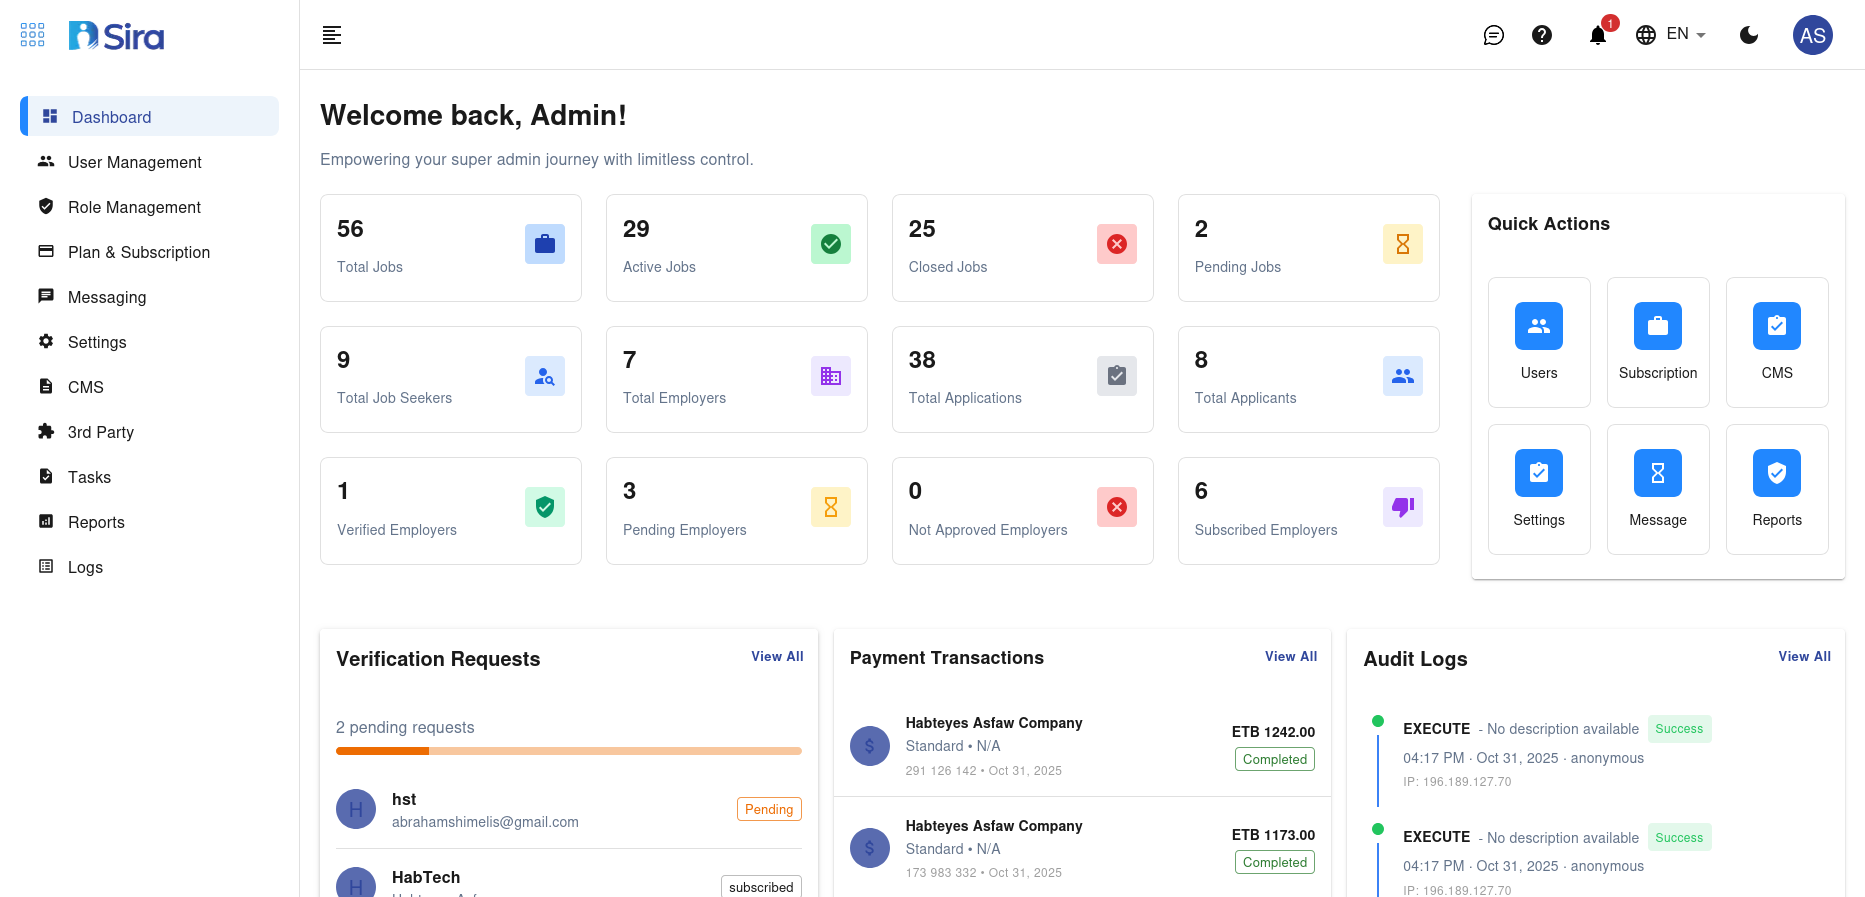
The Admin Portal Dashboard Sidebar is the main navigation area for administrators in the Recruitment System. It provides easy access to features like job management, candidate tracking, user administration, and reporting.
Sidebar Structure
Main Sections
| Section | Description |
|---|---|
| Dashboard | Overview of system activity, key metrics, and quick links. |
| Jobs | Manage job postings, applications, and hiring workflows. |
| Candidates | View, search, and manage candidate profiles and applications. |
| Users | Add, edit, or deactivate user accounts and permissions. |
| Reports | Generate and export reports on hiring metrics and performance. |
| Settings | Configure system preferences, permissions, and integrations. |
| Notifications | View and manage system alerts, reminders, and updates. |
| Support | Access help resources, submit tickets, or contact support. |
Detailed Section Guides
Step 1: Dashboard
Purpose: Provides a high-level overview of recruitment activities.
Features
- Real-time statistics (e.g., open jobs, new applications, pending tasks)
- Quick links to frequently used tools
- Customizable widgets for personalized insights
How to Use
- Use the dashboard to monitor system activity at a glance.
- Click widgets to explore detailed data.
Step 2: Jobs
Purpose: Manage all job-related activities.
Actions
- Create/Edit Jobs: Post new job openings or update existing ones.
- Job Listings: View all active, closed, or draft job postings.
- Applications: Track and filter applications by status (e.g., received, shortlisted, rejected).
- Workflow: Move candidates through hiring stages (e.g., screening, interview, offer).
How to Use
- Go to Jobs → All Jobs to see job postings.
- Use Filters to sort jobs by status, date, or department.
- Click a job title to edit or view details.
Step 3: Candidates
Purpose: Centralized candidate management.
Actions
- Search/Filter: Find candidates by name, skill, or application status.
- Profile Management: View resumes, notes, and communication history.
- Bulk Actions: Shortlist, reject, or tag multiple candidates at once.
- Communication: Send emails or schedule interviews directly from the dashboard.
How to Use
- Go to Candidates → All Candidates.
- Use the Search Bar to locate candidates.
- Click a candidate’s name to view and manage their profile.
Step 4: Users
Purpose: Manage user accounts and permissions.
Actions
- Add Users: Create accounts for recruiters, hiring managers, or admins.
- Edit Permissions: Assign roles (e.g., Admin, Recruiter) and set access levels.
- Deactivate Users: Remove access for inactive employees.
How to Use
- Go to Users → All Users.
- Click Add User to create a new account.
- Select a user to update permissions or deactivate them.
Step 5: Reports
Purpose: Generate insights into recruitment performance.
Actions
- Standard Reports: View pre-built reports (e.g., time-to-hire, source effectiveness).
- Custom Reports: Filter and customize data views.
- Export Data: Download in CSV, PDF, or Excel formats.
How to Use
- Navigate to Reports → Standard Reports.
- Apply Filters to narrow down results.
- Click Export to download.
Step 6: Settings
Purpose: Configure system-wide preferences.
Actions
- System Settings: Update company info, email templates, and notifications.
- Integrations: Connect third-party tools (ATS, HRIS, email services).
- Security: Manage passwords, 2FA, and IP restrictions.
How to Use
- Go to Settings → System Settings for general configuration.
- Visit Integrations for external tools.
- Use Security for authentication management.
Step 7: Notifications
Purpose: Stay updated on system activity.
Actions
- View Alerts: See updates for new applications, approvals, and messages.
- Mark as Read: Dismiss notifications after review.
- Customize Alerts: Choose email or in-app notifications.
How to Use
- Click the Notifications icon.
- Adjust settings under the gear icon for alert preferences.
Step 8: Support
Purpose: Access help and troubleshooting tools.
Actions
- Help Center: Browse FAQs, guides, and tutorials.
- Contact Support: Submit a ticket or chat with the team.
How to Use
- Navigate to Support → Help Center.
- Select Contact Support to reach assistance.
Best Practices
- Check the Dashboard daily for pending tasks or new applications.
- Use Filters to find specific jobs or candidates faster.
- Leverage Bulk Actions to manage large application sets efficiently.
- Limit Admin Access to authorized users for security.
Troubleshooting
| Issue | Solution |
|---|---|
| Missing Sections | Ensure your user role has proper permissions. Contact your admin. |
| Slow Performance | Clear browser cache or try incognito mode. |
| Error Messages | Check the Support section or contact your IT team. |
Need Help?
- Go to Support in the sidebar to submit a ticket or start a chat.
- Use the Feedback Form to suggest dashboard improvements.