User Management Manual
Overview
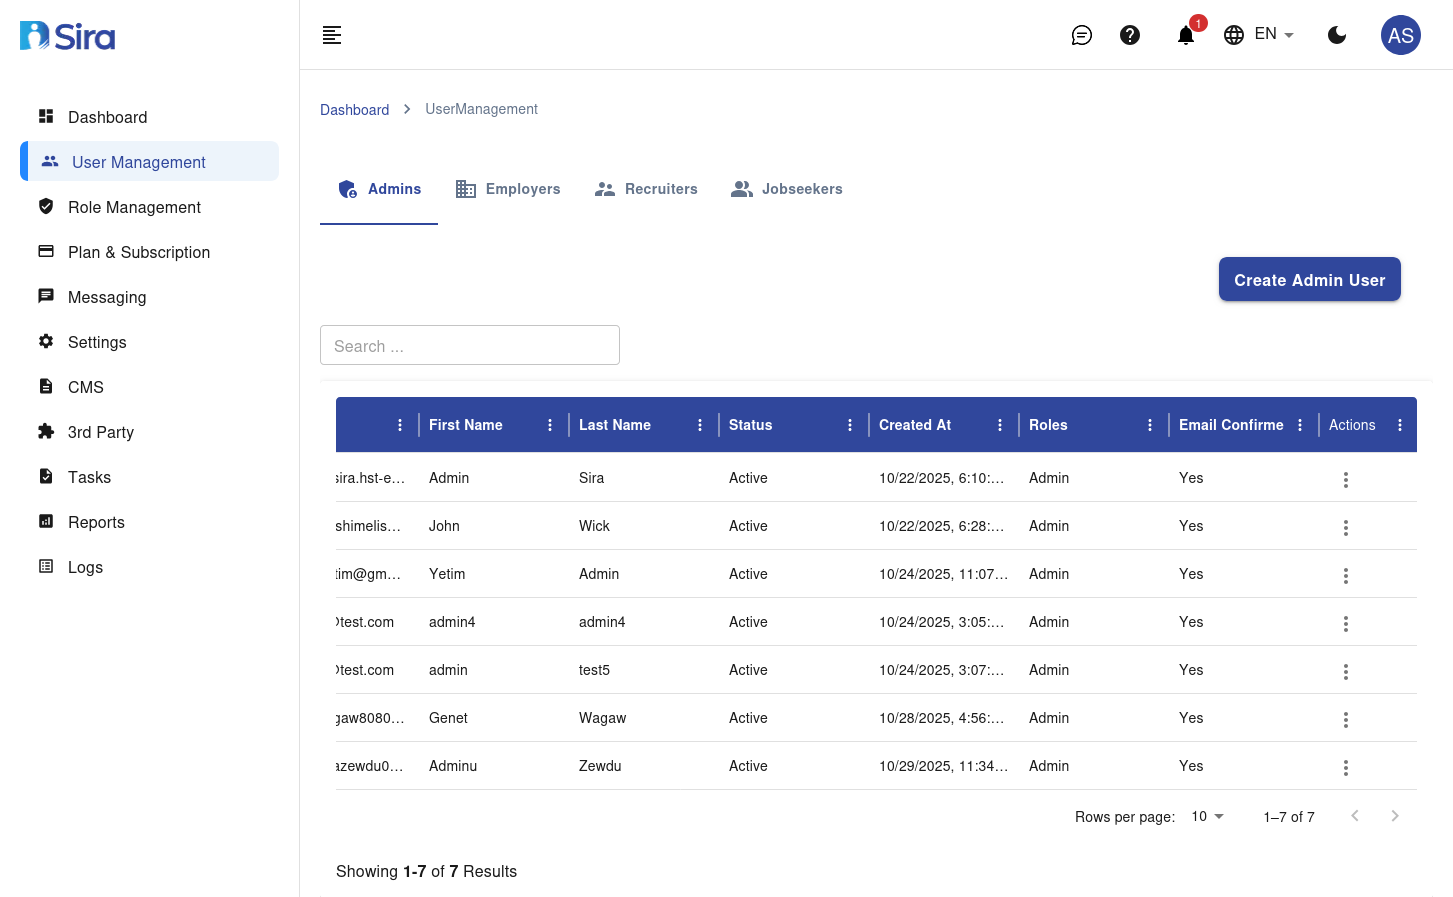
The User Management page in the Sira Recruitment System allows administrators to manage user accounts, roles, and permissions. This manual covers the sidebar menu, user list tabs, and key actions available on this page.
Sidebar Menu
The sidebar menu provides access to various administrative features. Here’s a breakdown of each section:
| Menu Item | Description |
|---|---|
| Dashboard | Overview of system activity, key metrics, and quick links. |
| User Management | Manage user accounts, roles, and permissions. (Current Page) |
| Role Management | Define and assign roles (e.g., Admin, Recruiter, Employer). |
| Plan & Subscription | Manage subscription plans, billing, and payment details. |
| Messaging | View and manage system messages and notifications. |
| Settings | Configure system-wide settings, preferences, and integrations. |
| CMS | Manage content for the platform (e.g., job descriptions, FAQs). |
| 3rd Party | Integrate and manage third-party tools and APIs. |
| Tasks | Track and manage system tasks and workflows. |
| Reports | Generate and export reports on system activity and performance. |
| Logs | View system logs for auditing and troubleshooting. |
User Management Page
1. User List Tabs
The User Management page includes tabs to filter users by their roles:
| Tab | Description |
|---|---|
| Admins | List of all admin users with full system access. |
| Employers | List of employer users who can post jobs and manage their company’s listings. |
| Recruiters | List of recruiter users who can manage candidates and job applications. |
| Jobseekers | List of jobseeker users who apply for jobs and manage their profiles. |
2. User List Table
The user list table displays detailed information about each user. Here’s a breakdown of the columns:
| Column | Description |
|---|---|
| # | Serial number of the user in the list. |
| Email address of the user. | |
| First Name | First name of the user. |
| Last Name | Last name of the user. |
| Status | Current status of the user (e.g., Active, Inactive). |
| Created At | Date and time when the user account was created. |
| Roles | Role(s) assigned to the user (e.g., Admin, Employer). |
| Email Confirm | Indicates whether the user’s email has been confirmed. |
3. Key Actions
A. Create Admin User
- Purpose: Add a new admin user to the system.
- How to Use:
- Click the Create Admin User button.
- Fill in the required details (e.g., email, first name, last name).
- Assign the appropriate role(s).
- Click Save to create the user.
B. Search Users
- Purpose: Quickly find users by name, email, or other criteria.
- How to Use:
- Enter the search term in the Search box.
- Press Enter or click the search icon to filter the user list.
C. Edit User
- Purpose: Update user details or change their roles.
- How to Use:
- Click on a user’s row in the table.
- Edit the necessary details.
- Click Save to apply changes.
D. Change User Status
- Purpose: Activate or deactivate a user account.
- How to Use:
- Select the user from the list.
- Click the Status dropdown.
- Choose Active or Inactive.
- Click Save to update the status.
Best Practices
- Regular Audits: Review the user list regularly to ensure all accounts are active and appropriately assigned.
- Role Assignment: Assign roles based on the user’s responsibilities to maintain security.
- Email Confirmation: Ensure all users confirm their email addresses to avoid communication issues.
- Search Efficiency: Use the search function to quickly locate users instead of manually scrolling through the list.
Troubleshooting
| Issue | Solution |
|---|---|
| Cannot create a new user | Ensure you have admin privileges. Contact support if the issue persists. |
| User not appearing in the list | Verify the search criteria or check if the user is filtered by role. |
| Unable to edit user details | Ensure the user account is not locked or restricted. |
| Email not confirmed | Resend the confirmation email to the user. |
Need Help?
- Support: Click the Support tab in the sidebar to submit a ticket or chat with the team.
- Feedback: Share your suggestions for improving the User Management page via the feedback form.