CMS
Introduction
This manual provides instructions for using the CMS (Content Management System) in the Sira platform. The CMS allows administrators to manage banners, blogs, FAQs, authors, and trusted organizations.
Accessing the CMS Sidebar
- Log in to your Sira admin account.
- Navigate to the CMS section in the left sidebar.
CMS Sub-Tabs
The CMS sidebar contains the following sub-tabs:
| Tab Name | Description |
|---|---|
| Manage Banner | Create, edit, and manage banners displayed on the platform. |
| Manage Blogs | Create, edit, and manage blog posts. |
| Manage FAQs | Create, edit, and manage frequently asked questions (FAQs). |
| Manage Author | Create, edit, and manage authors for blog posts. |
| Manage Trusted By | Create, edit, and manage organizations that trust your platform. |
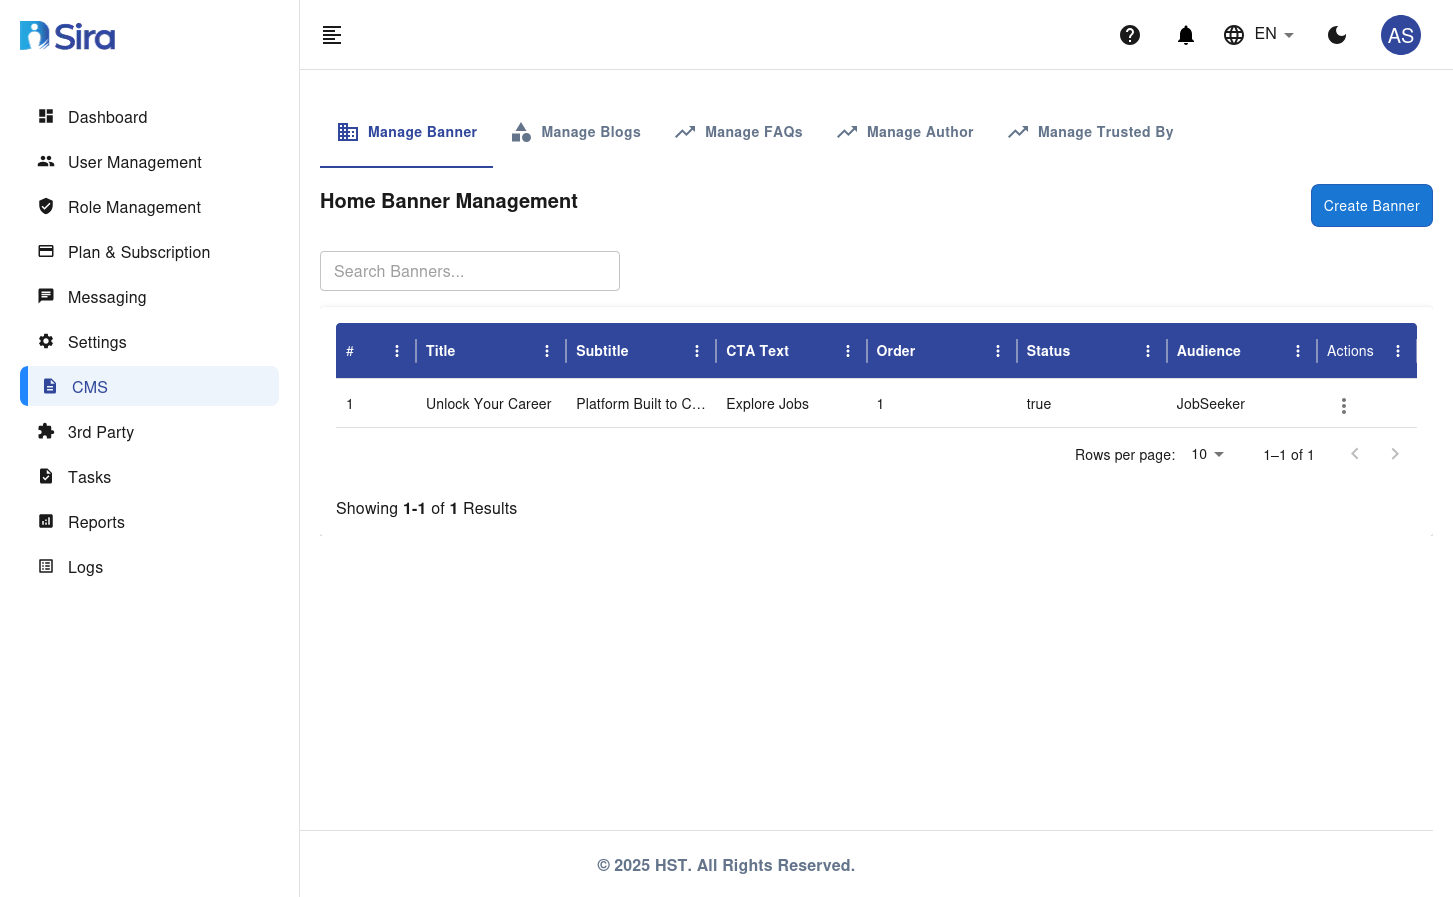
Manage Banner
Overview
The Manage Banner tab allows you to create, edit, and manage banners displayed on the platform.
Features
- Create Banner: Add a new banner.
- Search Banners: Search for existing banners.
- Banner Table: View, edit, or delete banners.
Banner Table Columns
| Column | Description |
|---|---|
| # | Banner ID |
| Title | Title of the banner |
| Subtitle | Subtitle of the banner |
| CTA Text | Call-to-action text |
| Order | Display order of the banner |
| Status | Active/Inactive status |
| Audience | Target audience (e.g., JobSeeker) |
| Actions | Edit/Delete options |
Create Home Banner Form
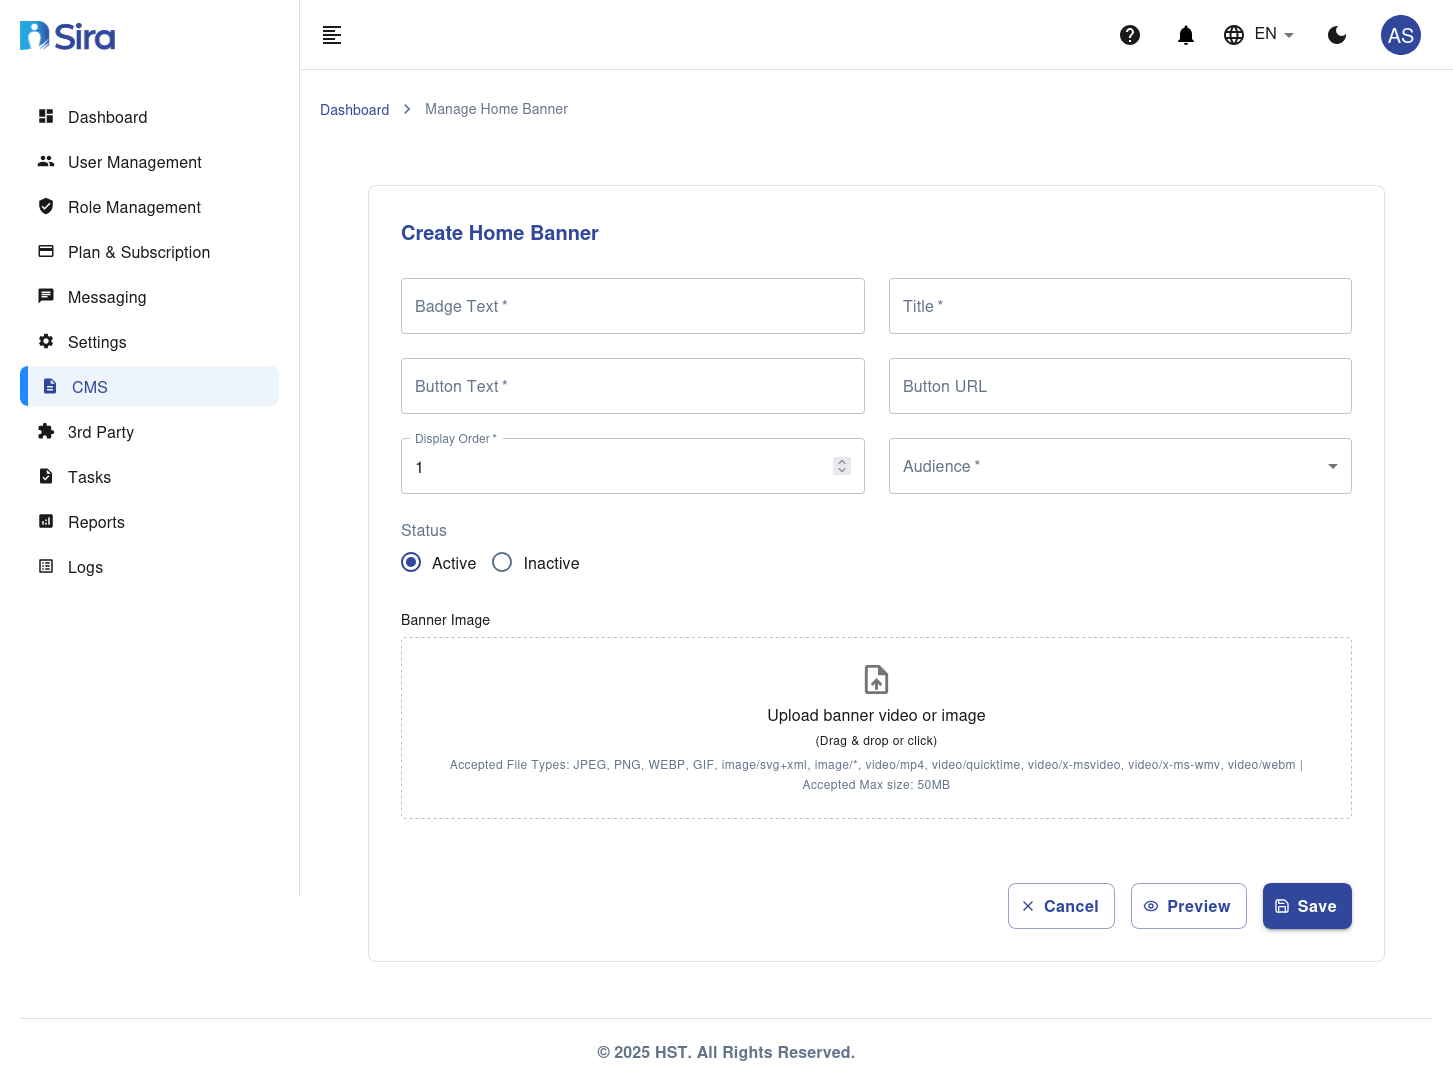
Form Fields
| Field | Description | Required |
|---|---|---|
| Badge Text | Text for the badge on the banner | Yes |
| Title | Title of the banner | Yes |
| Button Text | Text for the button on the banner | Yes |
| Button URL | URL for the button on the banner | No |
| Display Order | Order in which the banner will be displayed | Yes |
| Audience | Target audience for the banner | Yes |
| Status | Status of the banner (Active/Inactive) | Yes |
| Banner Image | Image or video for the banner (upload field) | Yes |
Accepted File Types for Banner Image
- JPEG, PNG, GIF, WEBP, SVG+XML
- Video: MP4, QuickTime, x-msvideo, x-ms-wmv, webm
Maximum File Size
- 50MB
Instructions
-
Access the Form:
- Navigate to the CMS section in the sidebar.
- Select Manage Banner.
- Click the Create Home Banner button.
-
Fill in the Form:
- Enter the Badge Text for the banner.
- Enter the Title of the banner.
- Enter the Button Text for the banner.
- Enter the Button URL for the banner (optional).
- Set the Display Order for the banner.
- Select the Audience for the banner.
- Set the Status (Active/Inactive).
- Upload a Banner Image by dragging and dropping or clicking to browse.
-
Save the Banner:
- Click the Preview button to preview the banner.
- Click the Save button to add the new banner to the system.
- Click the Cancel button to discard the form without saving.
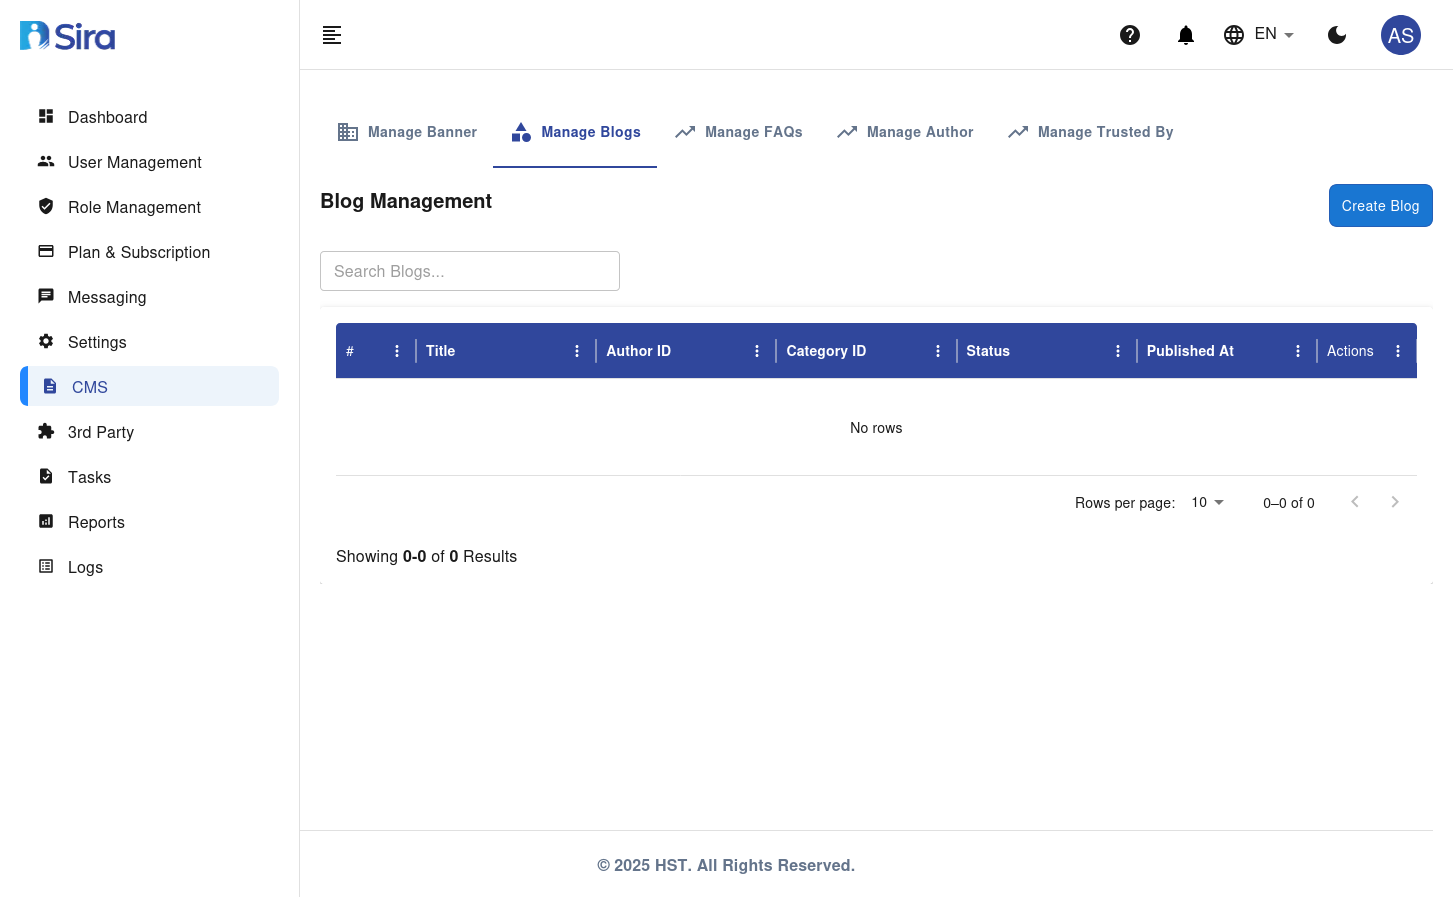
Manage Blogs
Overview
The Manage Blogs tab allows you to create, edit, and manage blog posts.
Features
- Create Blog: Add a new blog post.
- Search Blogs: Search for existing blog posts.
- Blog Table: View, edit, or delete blog posts.
Blog Table Columns
| Column | Description |
|---|---|
| # | Blog ID |
| Title | Title of the blog post |
| Author ID | ID of the author |
| Category ID | Category of the blog post |
| Status | Published/Draft status |
| Published At | Date and time of publication |
| Actions | Edit/Delete options |
Create Blog Form
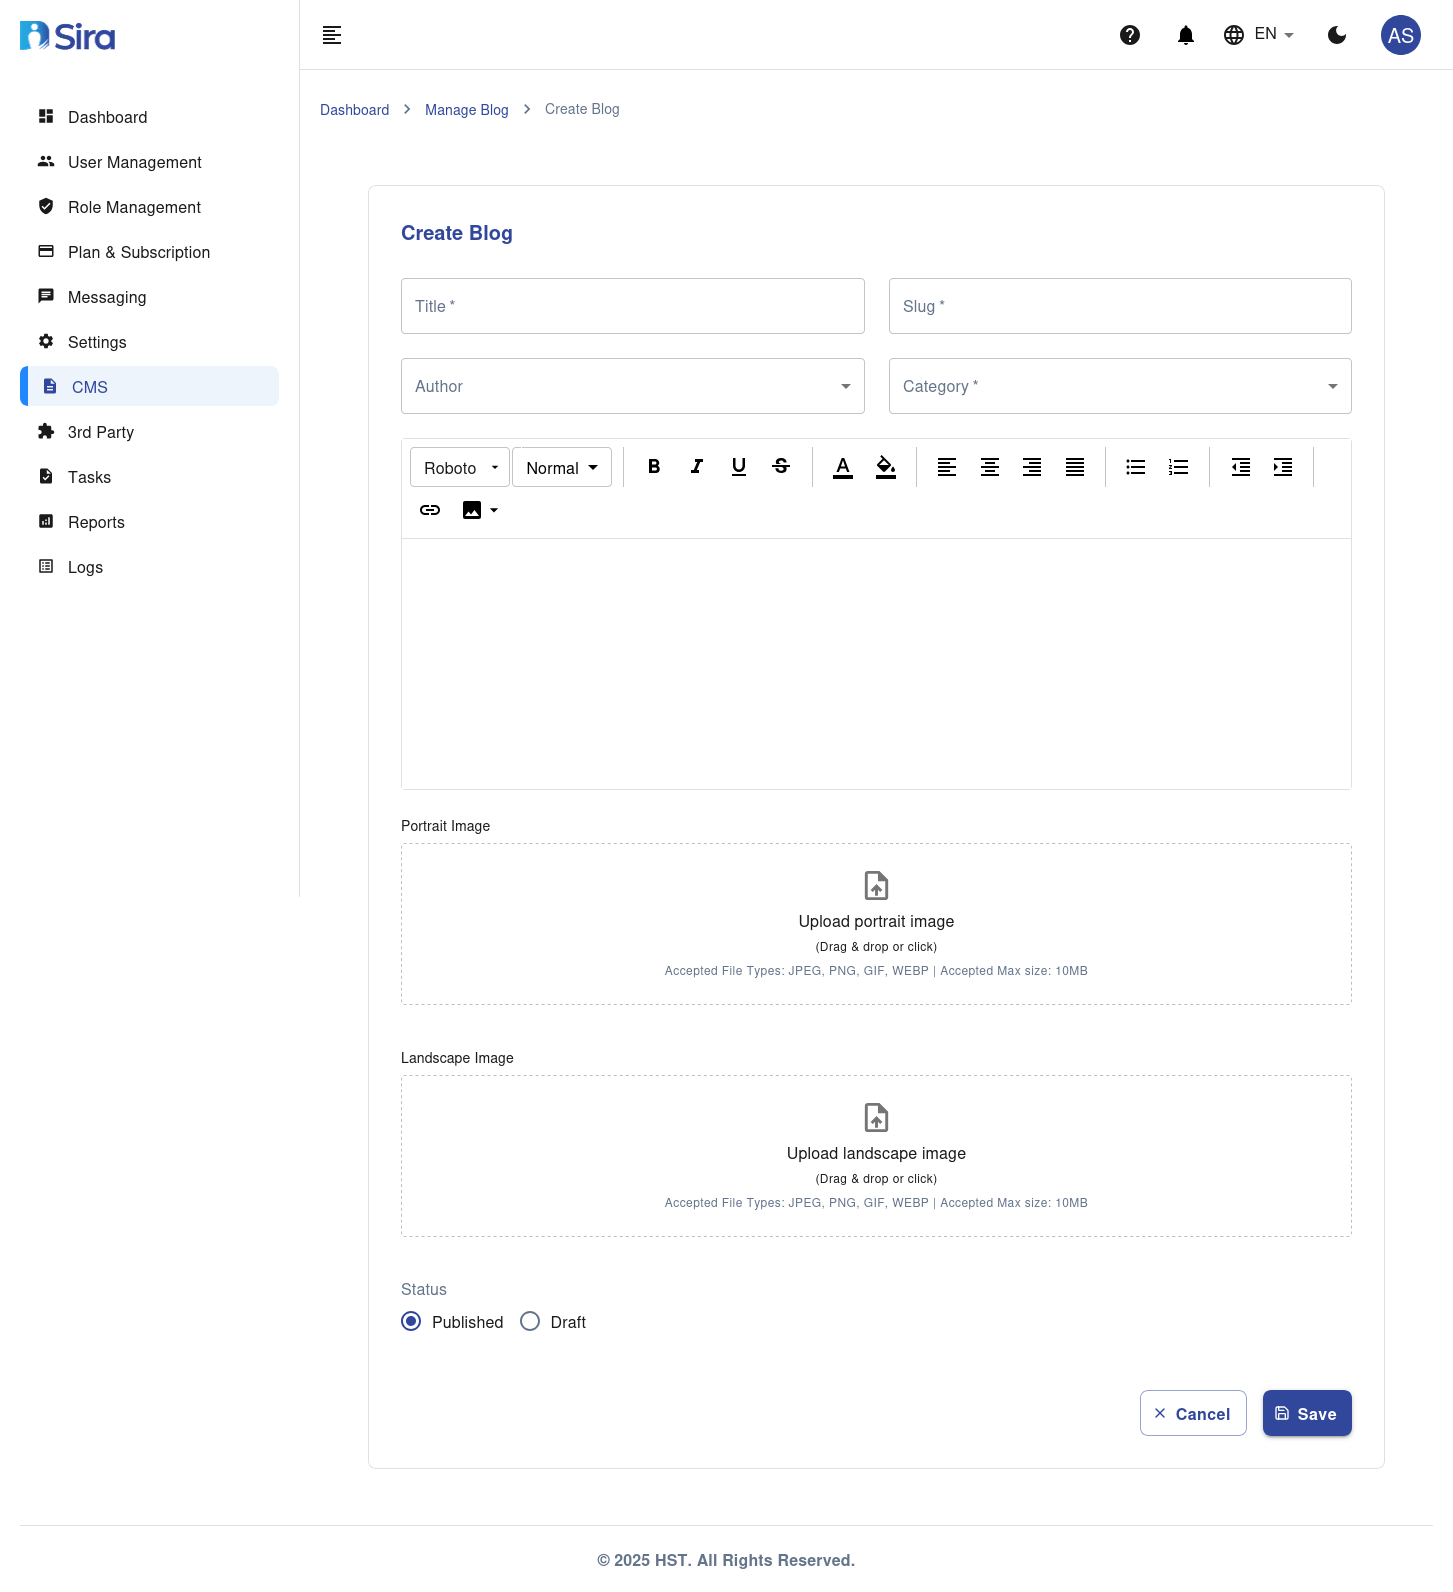
Form Fields
| Field | Description | Required |
|---|---|---|
| Title | Title of the blog post | Yes |
| Slug | URL-friendly version of the title | Yes |
| Author | Author of the blog post | Yes |
| Category | Category of the blog post | Yes |
| Content | Content of the blog post (rich text editor) | Yes |
| Portrait Image | Portrait image for the blog post (upload field) | No |
| Landscape Image | Landscape image for the blog post (upload field) | No |
| Status | Status of the blog post (Published/Draft) | Yes |
Accepted File Types for Images
- JPEG, PNG, GIF, WEBP
Maximum File Size
- 10MB
Instructions
-
Access the Form:
- Navigate to the CMS section in the sidebar.
- Select Manage Blog.
- Click the Create Blog button.
-
Fill in the Form:
- Enter the Title of the blog post.
- Enter the Slug for the blog post.
- Select the Author of the blog post.
- Select the Category of the blog post.
- Write the Content of the blog post using the rich text editor.
- Upload a Portrait Image by dragging and dropping or clicking to browse (optional).
- Upload a Landscape Image by dragging and dropping or clicking to browse (optional).
- Set the Status (Published/Draft).
-
Save the Blog Post:
- Click the Save button to add the new blog post to the system.
- Click the Cancel button to discard the form without saving.
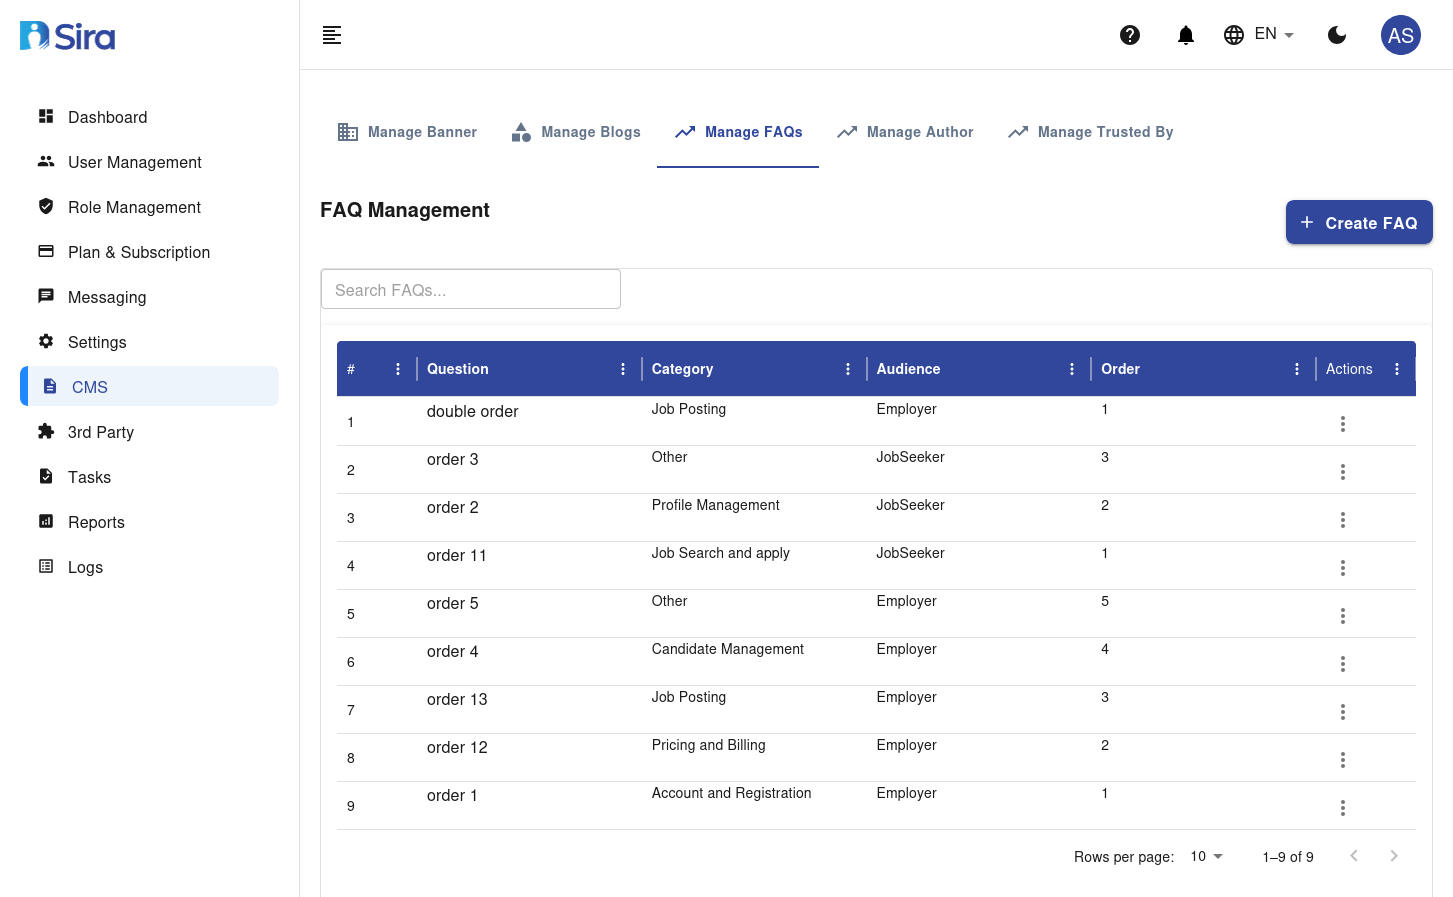
Manage FAQs
Overview
The Manage FAQs tab allows you to create, edit, and manage frequently asked questions (FAQs).
Features
- Create FAQ: Add a new FAQ.
- Search FAQs: Search for existing FAQs.
- FAQ Table: View, edit, or delete FAQs.
FAQ Table Columns
| Column | Description |
|---|---|
| # | FAQ ID |
| Question | FAQ question |
| Category | Category of the FAQ |
| Audience | Target audience (e.g., JobSeeker) |
| Order | Display order of the FAQ |
| Actions | Edit/Delete options |
Frequently Asked Question Form
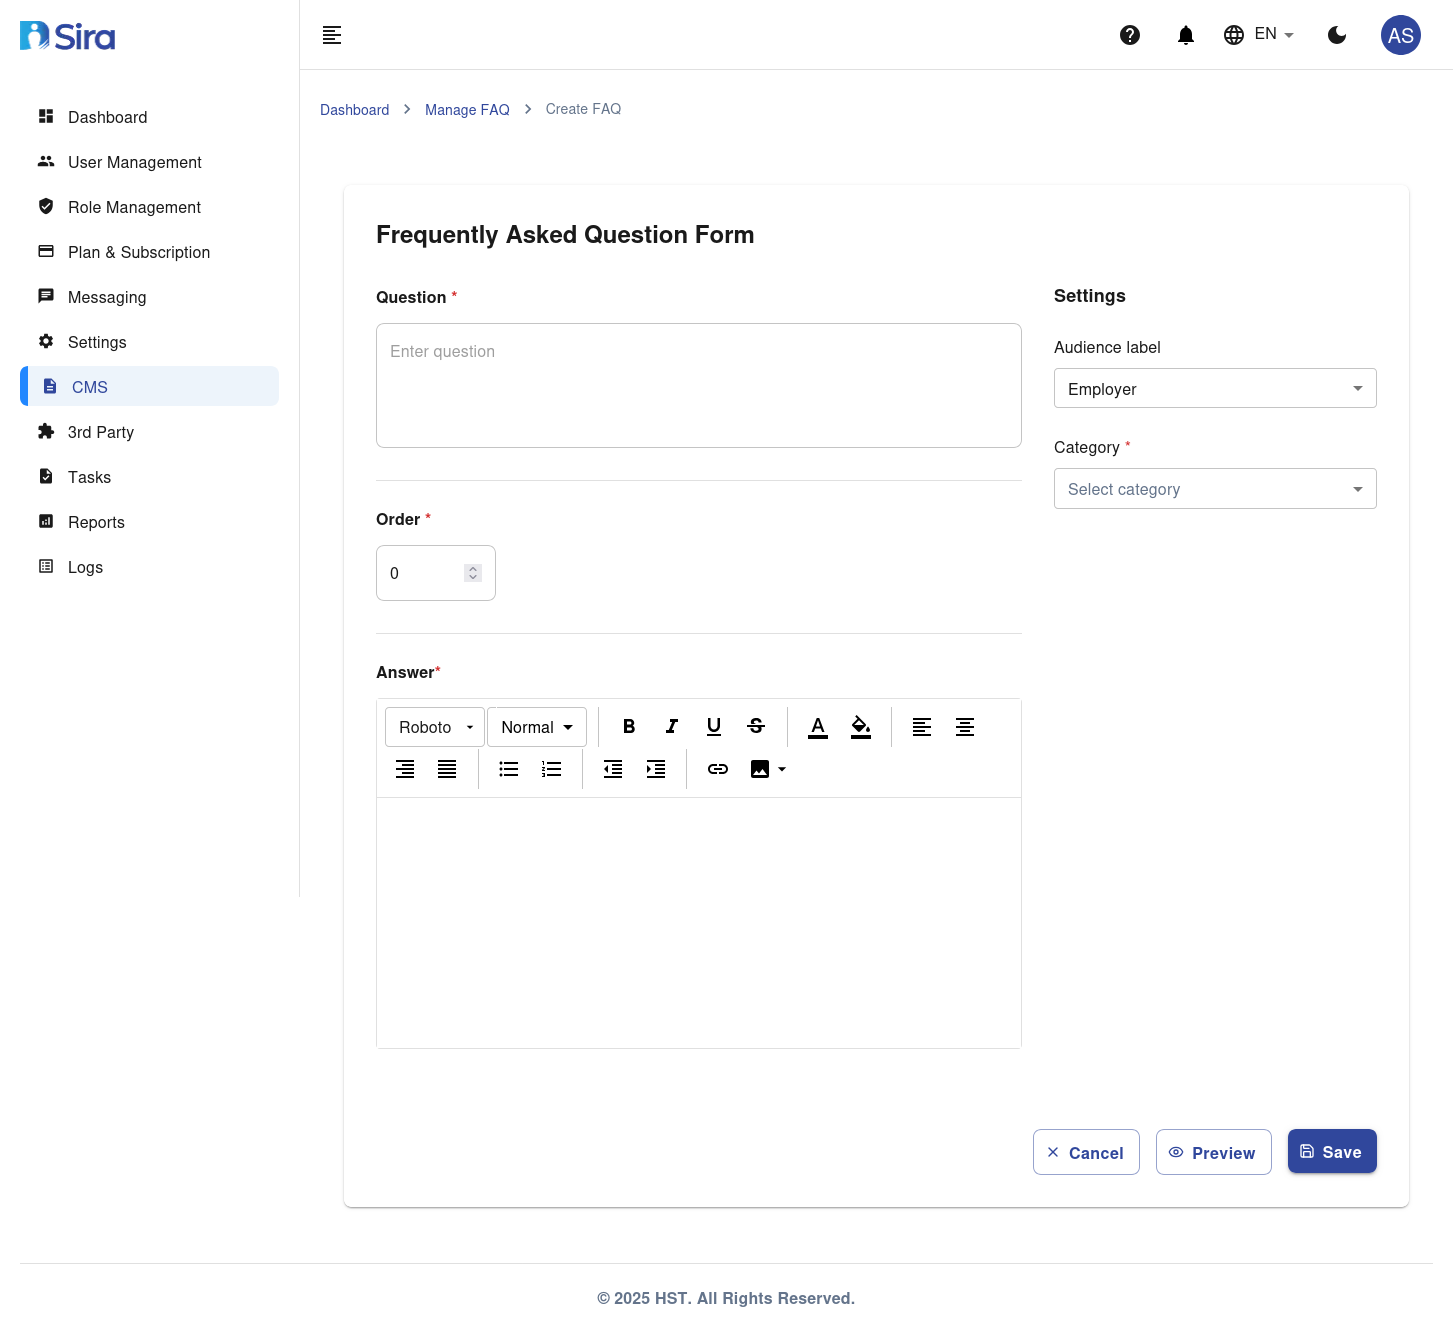
Form Fields
| Field | Description | Required |
|---|---|---|
| Question | The question for the FAQ | Yes |
| Order | Display order of the FAQ | Yes |
| Answer | The answer for the FAQ (rich text editor) | Yes |
| Audience | Target audience for the FAQ | Yes |
| Category | Category of the FAQ | Yes |
Instructions
-
Access the Form:
- Navigate to the CMS section in the sidebar.
- Select Manage FAQ.
- Click the Create FAQ button.
-
Fill in the Form:
- Enter the Question for the FAQ.
- Set the Order for the FAQ.
- Write the Answer for the FAQ using the rich text editor.
- Select the Audience for the FAQ.
- Select the Category for the FAQ.
-
Save the FAQ:
- Click the Preview button to preview the FAQ.
- Click the Save button to add the new FAQ to the system.
- Click the Cancel button to discard the form without saving.
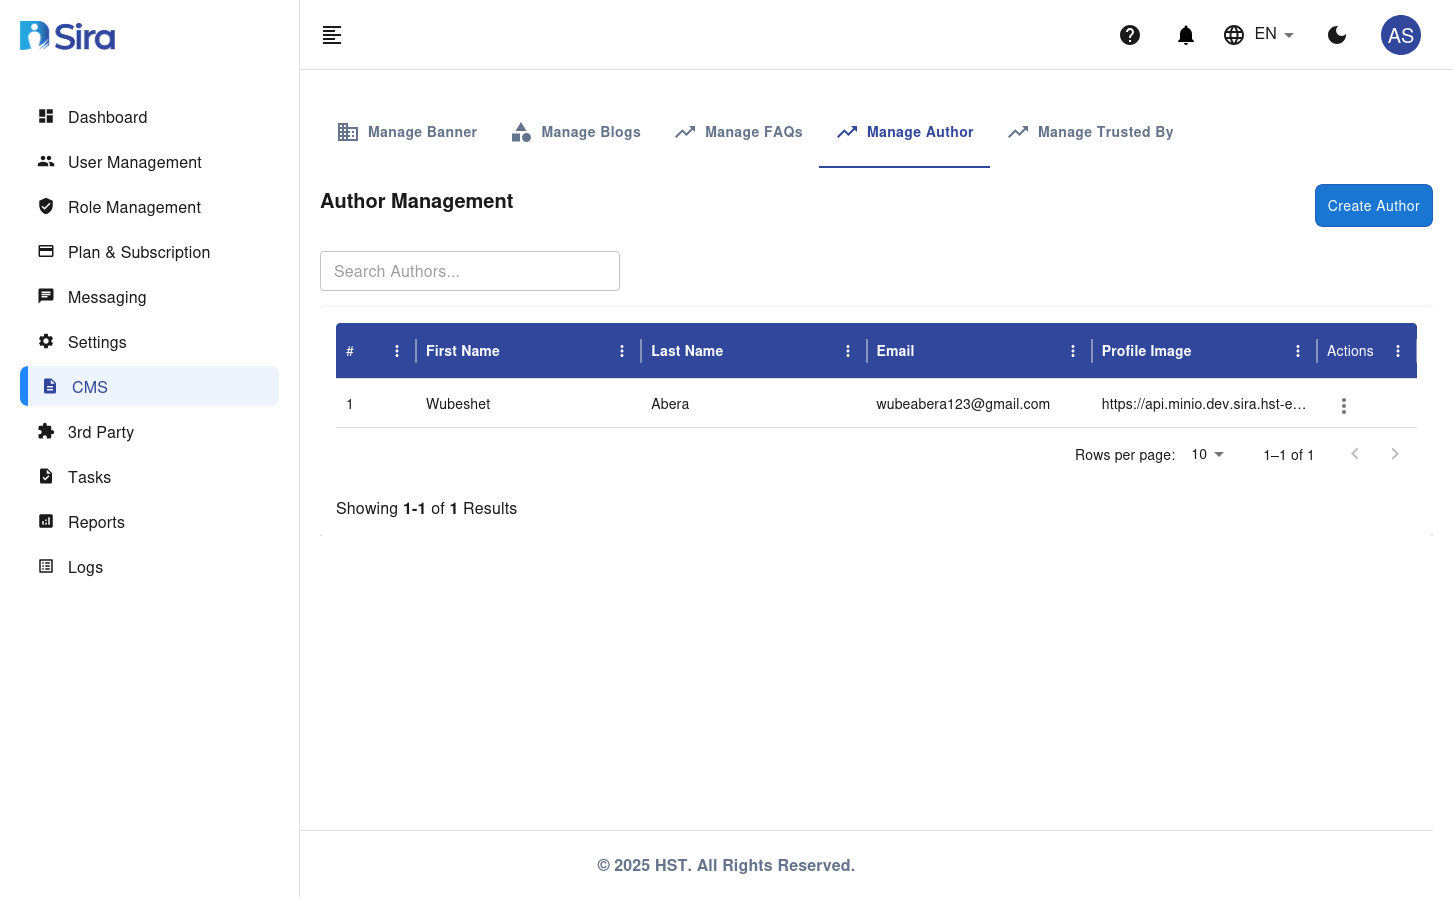
Manage Author
Overview
The Manage Author tab allows you to create, edit, and manage authors for blog posts.
Features
- Create Author: Add a new author.
- Search Authors: Search for existing authors.
- Author Table: View, edit, or delete authors.
Author Table Columns
| Column | Description |
|---|---|
| # | Author ID |
| First Name | First name of the author |
| Last Name | Last name of the author |
| Email address of the author | |
| Profile Image | Profile image URL of the author |
| Actions | Edit/Delete options |
Create Author Form
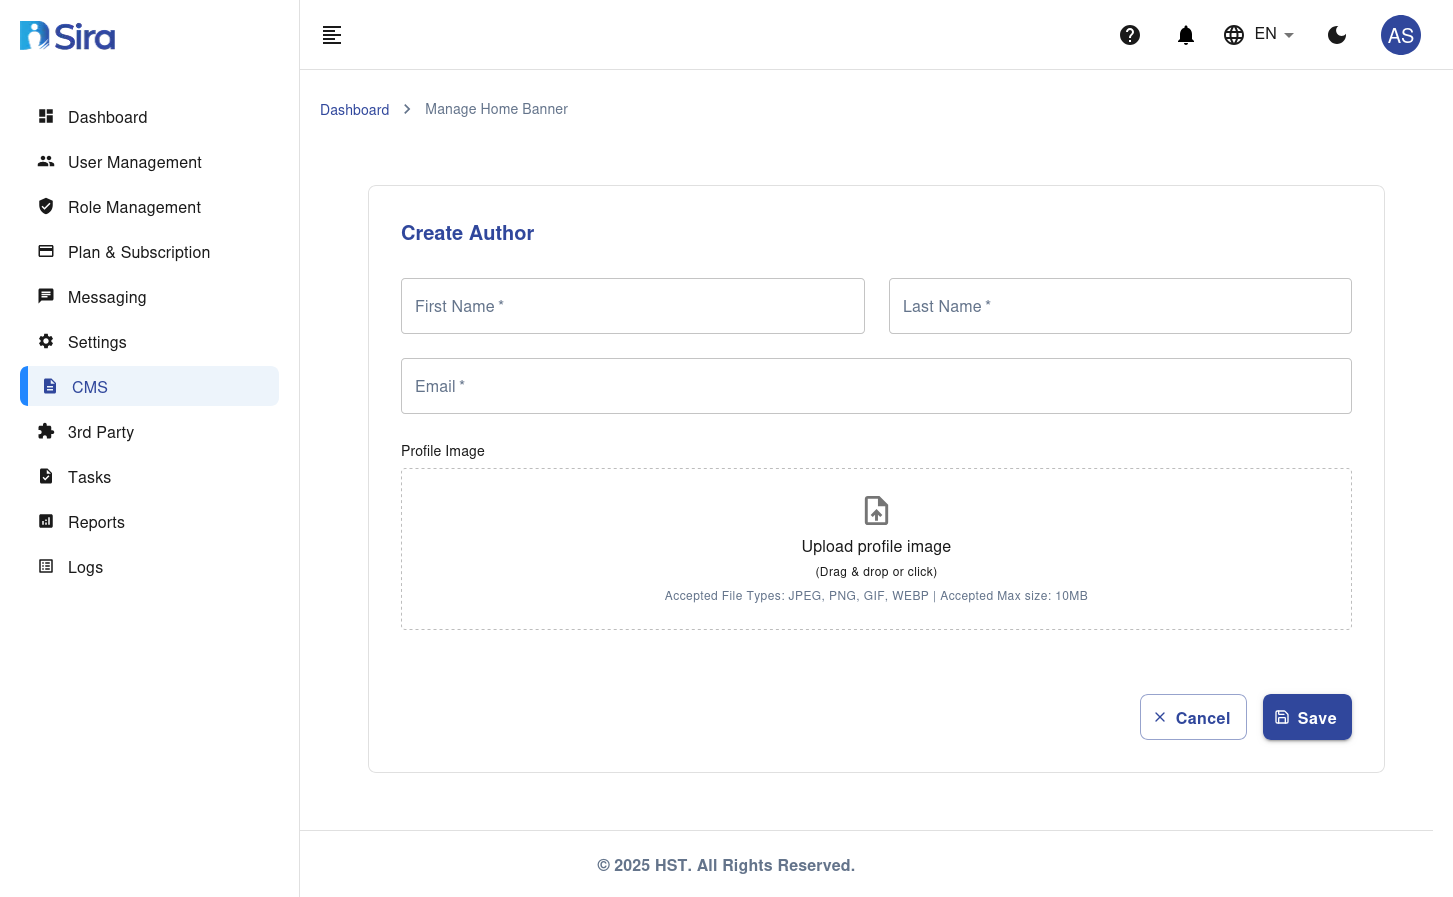
Form Fields
| Field | Description | Required |
|---|---|---|
| First Name | First name of the author | Yes |
| Last Name | Last name of the author | Yes |
| Email address of the author | Yes | |
| Profile Image | Profile image of the author (upload field) | No |
Accepted File Types for Profile Image
- JPEG, PNG, GIF, WEBP
Maximum File Size
- 10MB
Instructions
-
Access the Form:
- Navigate to the CMS section in the sidebar.
- Select Manage Author.
- Click the Create Author button.
-
Fill in the Form:
- Enter the First Name of the author.
- Enter the Last Name of the author.
- Enter the Email address of the author.
- Upload a Profile Image by dragging and dropping or clicking to browse.
-
Save the Author:
- Click the Save button to add the new author to the system.
- Click the Cancel button to discard the form without saving.
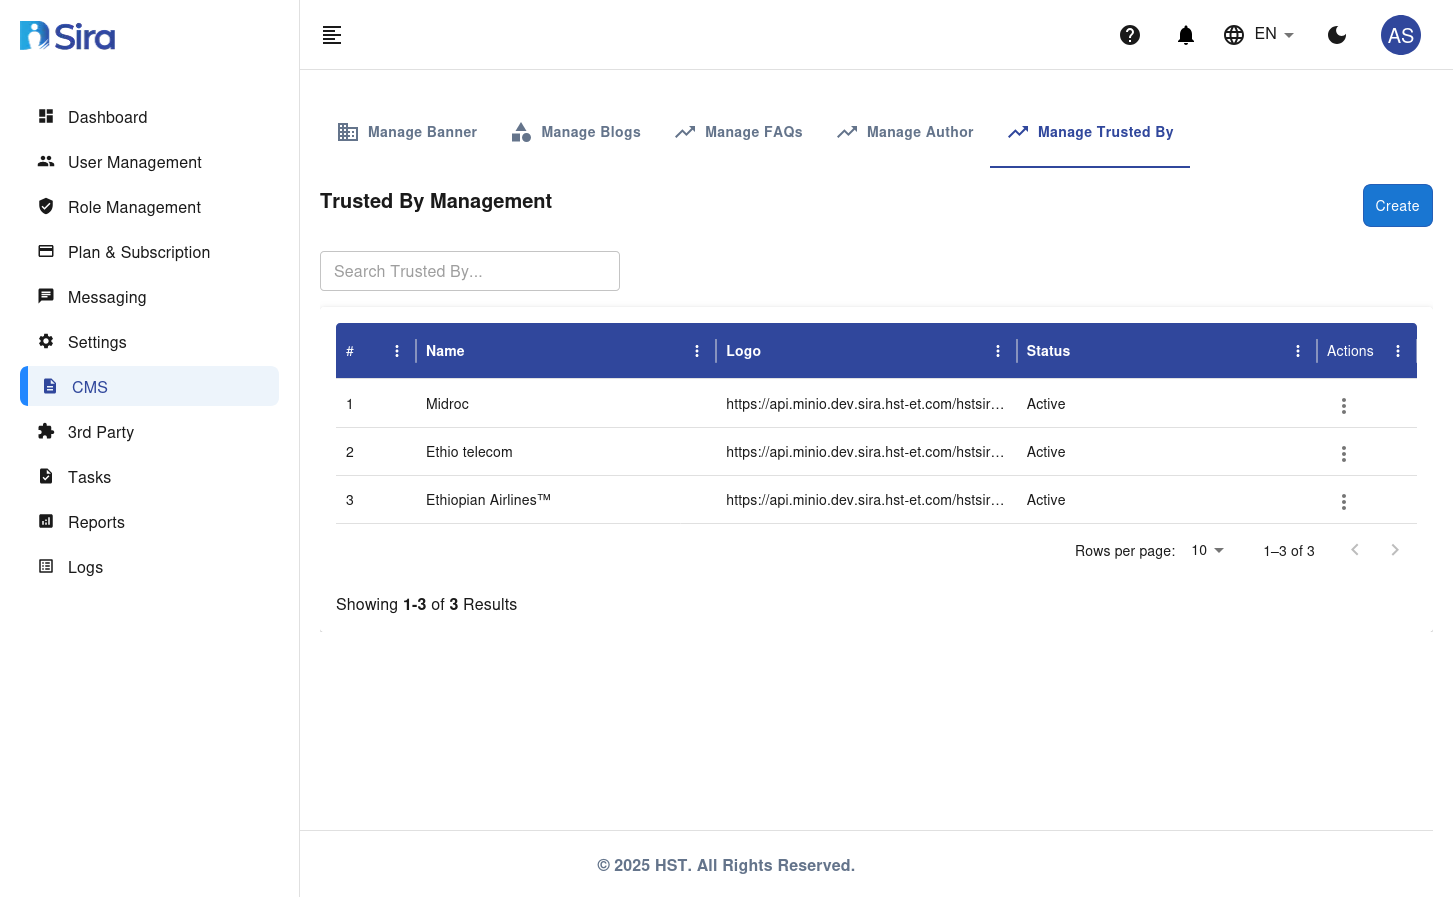
Manage Trusted By
Overview
The Manage Trusted By tab allows you to create, edit, and manage organizations that trust your platform.
Features
- Create Trusted By: Add a new trusted organization.
- Search Trusted By: Search for existing trusted organizations.
- Trusted By Table: View, edit, or delete trusted organizations.
Trusted By Table Columns
| Column | Description |
|---|---|
| # | Trusted organization ID |
| Name | Name of the trusted organization |
| Logo | Logo URL of the trusted organization |
| Status | Active/Inactive status |
| Actions | Edit/Delete options |
Create Trusted By Form
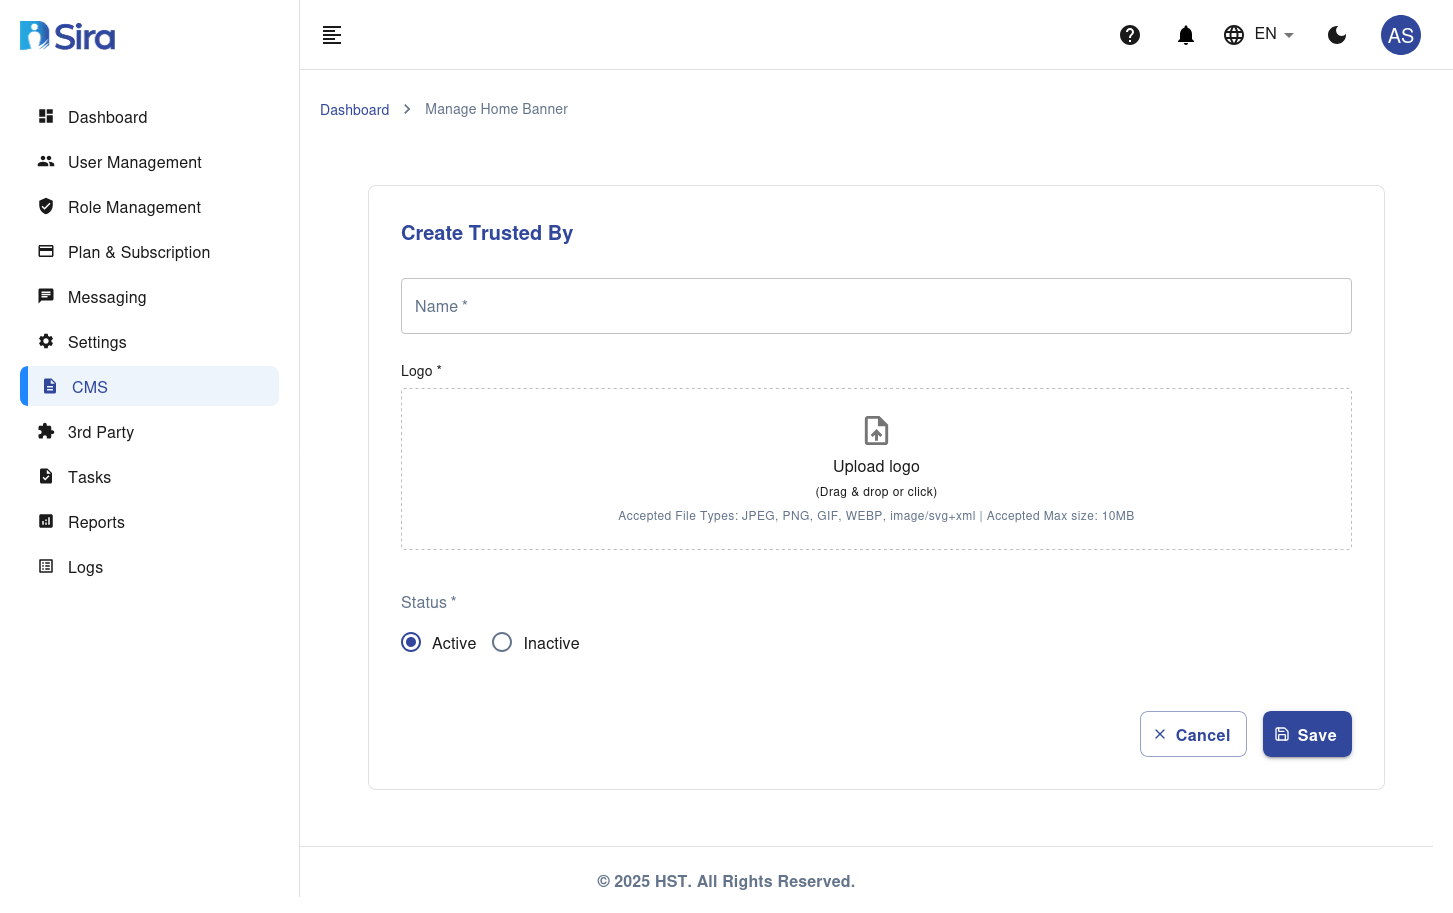
Form Fields
| Field | Description | Required |
|---|---|---|
| Name | Name of the trusted organization | Yes |
| Logo | Logo of the trusted organization (upload field) | Yes |
| Status | Status of the trusted organization (Active/Inactive) | Yes |
Accepted File Types for Logo
- JPEG, PNG, GIF, WEBP, SVG+XML
Maximum File Size
- 10MB
Instructions
-
Access the Form:
- Navigate to the CMS section in the sidebar.
- Select Manage Trusted By.
- Click the Create button.
-
Fill in the Form:
- Enter the Name of the trusted organization.
- Upload a Logo by dragging and dropping or clicking to browse.
- Select the Status (Active/Inactive).
-
Save the Trusted Organization:
- Click the Save button to add the new trusted organization to the system.
- Click the Cancel button to discard the form without saving.
General Instructions
Creating a New Entry
- Navigate to the relevant tab (e.g., Manage Banner).
- Click the "Create" button.
- Fill in the required details.
- Click "Save" to confirm.
Editing an Entry
- Locate the entry in the table.
- Click the "Actions" button.
- Select "Edit".
- Update the details.
- Click "Save" to confirm.
Deleting an Entry
- Locate the entry in the table.
- Click the "Actions" button.
- Select "Delete".
- Confirm the deletion.
Troubleshooting
| Issue | Solution |
|---|---|
| Unable to save changes | Check your internet connection and ensure all required fields are filled. |
| Unable to upload images | Ensure the image format is supported (e.g., PNG, JPG) and the file size is within the limit. |
Contact Support
For further assistance, contact the support team at [support email/phone].